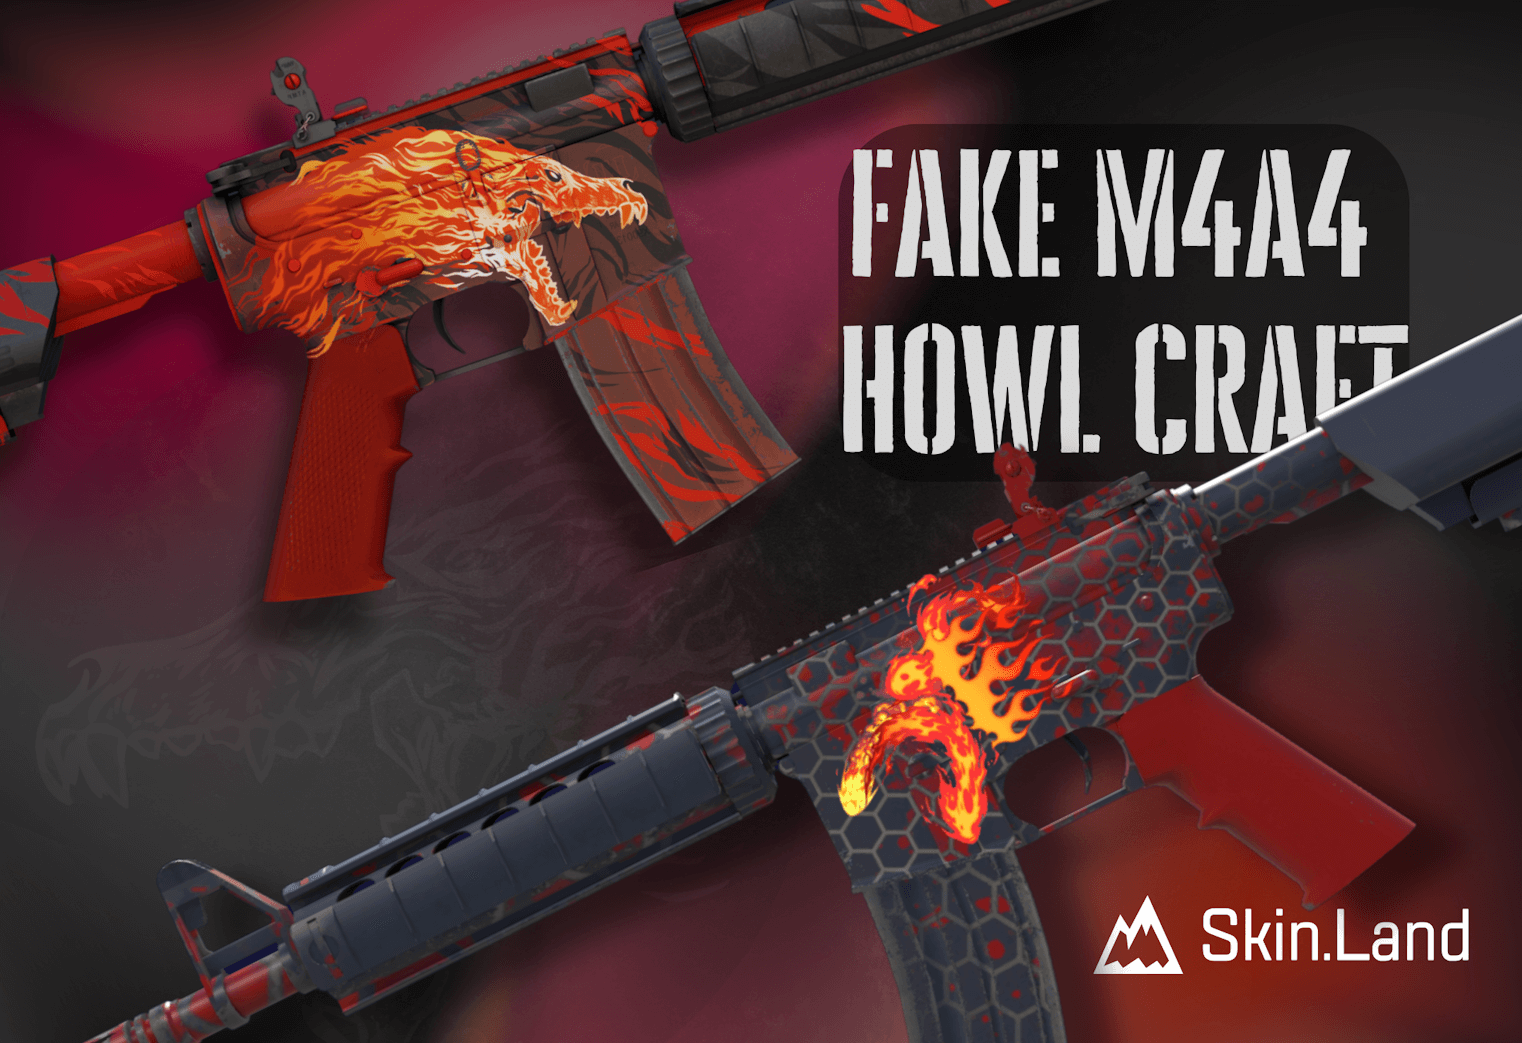

Fake M4A4 Howl Sticker Craft in CS2
Earlier in 2025, Valve introduced “The Armory” update, a mostly style-oriented update centered around the enhanced customization in Counter-Strike 2. Aside from adding a bunch of cosmetics and charms, a new category of CS2 customization, Valve finally allowed players to apply, rotate and flip the stickers the way they wanted to. Finally, players on a budget can cook up a diet Howl sticker craft for pretty much nothing. While the regular M4A4 Howl will cost you around 8k Factory New, our budget-friendly M4A4 fake Howl craft will be around 3 dollars total. More on that below.
How to Make Fake M4A4 Howl With Stickers
While it may seem complicated at first, it’s extremely easy to create this craft once you have all the necessary ingredients in place. Here’s a step-by-step tutorial on how to create a fake M4A4 Howl craft.
Gather the M4A4 skin and the required stickers
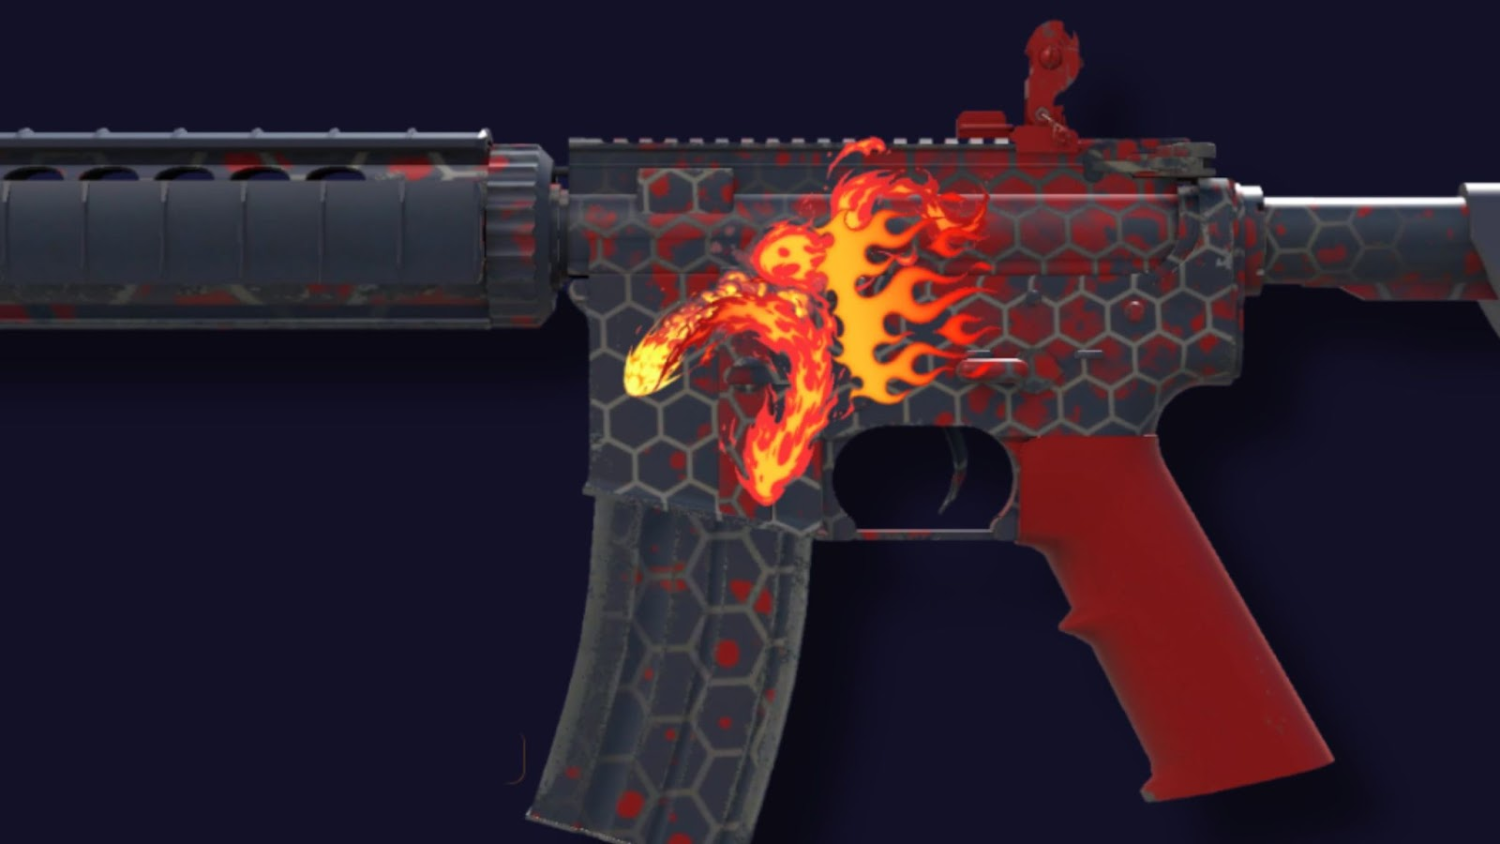
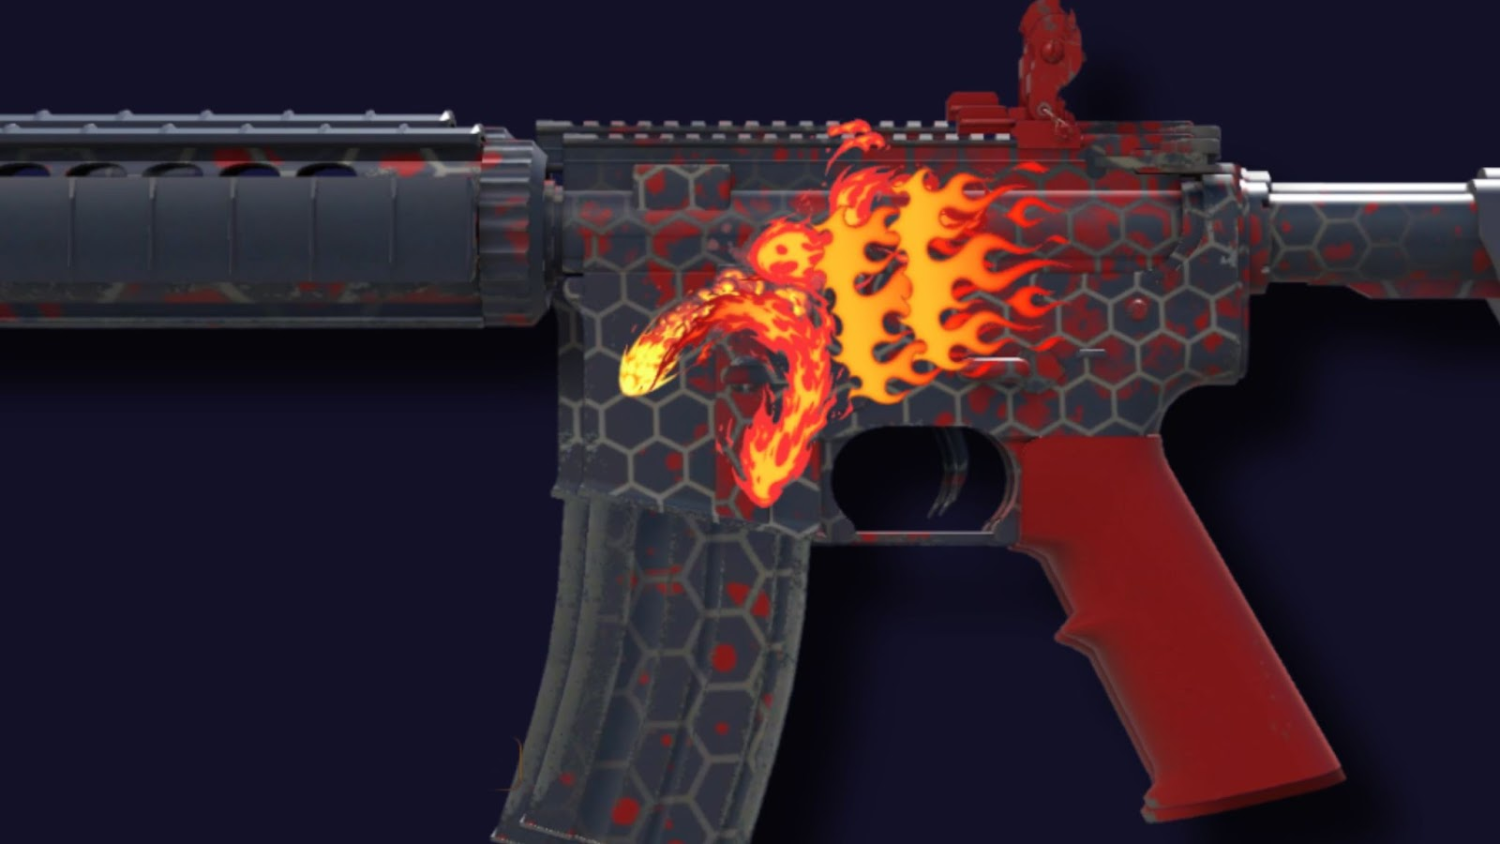
First things first, you’ll need an M4A4 skin that will serve as a base for the craft. We need to select something with a similar color palette that will not overpower the stickers with vibrant colors or graphics. In our own fake Howl craft we’ve selected an M4A4 Converter as it is a pretty cheap skin that fits well enough for our craft. However, you can also try the following skins if the hexagonal grid is too tacky or “techy” for your taste:
The M4A4 | Converter will be the cheapest one, as its Factory New Non-Souvenir version costs only 80 cents, which is a ridiculous price tag to pass on. The Evil Daimyo and Red DDPAT will set you back $4,5 and $13 respectively, both in Factory New quality. What’s interesting with the budget Howl craft is that you don’t necessarily need a Factory New skin to serve as a base layer, you may find the Battle-Scarred quality to fit better the scorching hot aesthetic. Now that we’ve got that out of the way, it’s time to get the stickers:
All these stickers are available at Skin.Land for the lowest prices on the market, which means that your craft will fit within the $5 budget.
Apply the stickers
The order of the stickers application can be random, but players usually start in the following order:
Boom Trail: Start with this sticker by applying it on the lower part of the receiver and rotate it to mimic the head of the wolf in the original Howl skin.
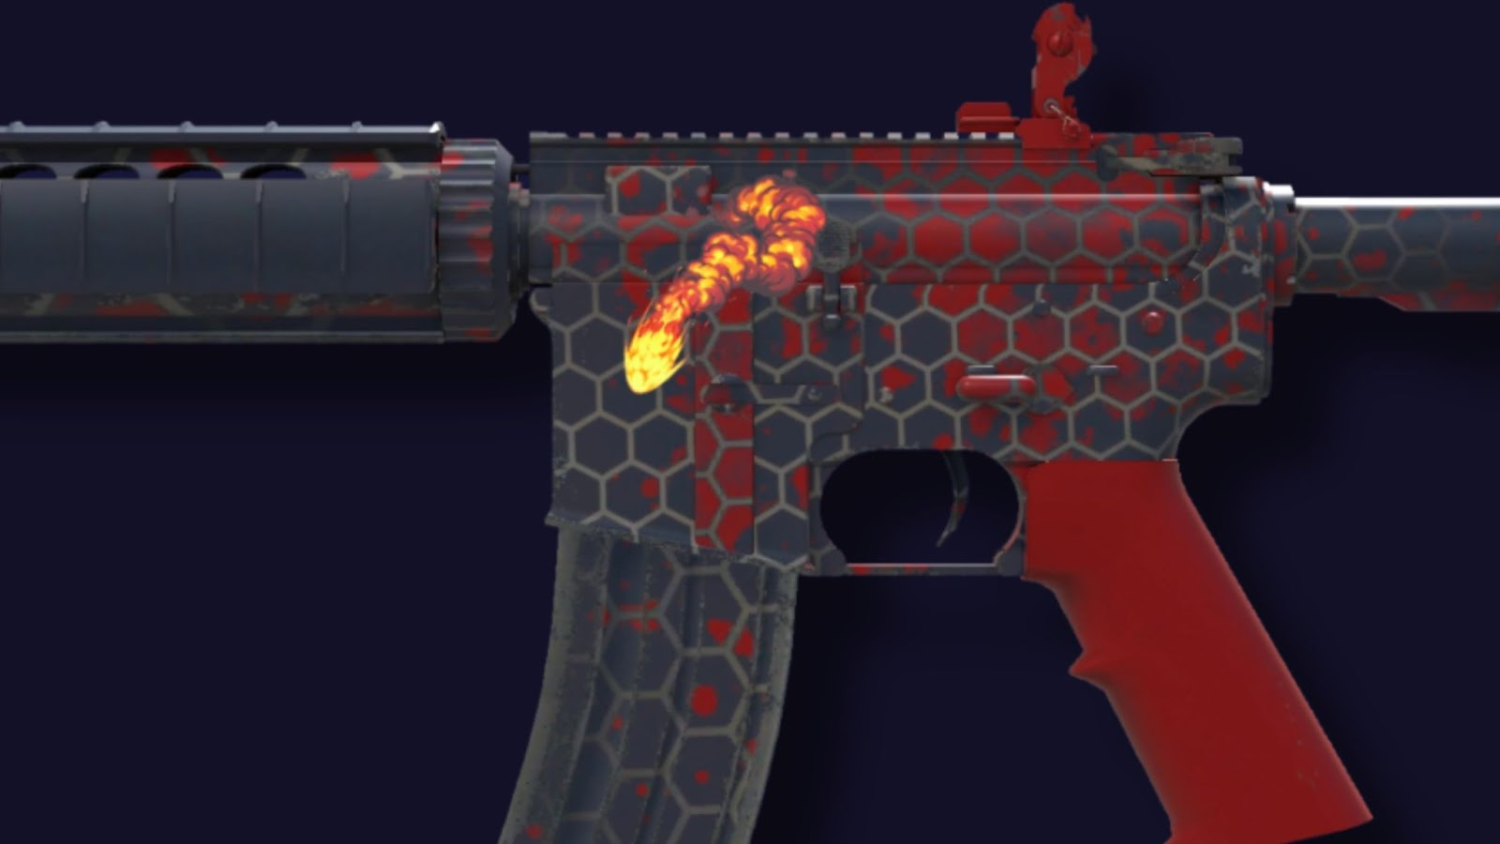
Scorch Loop: The next sticker should resemble the jaw of the wolf’s head, so place it underneath the first sticker by connecting them in one place.
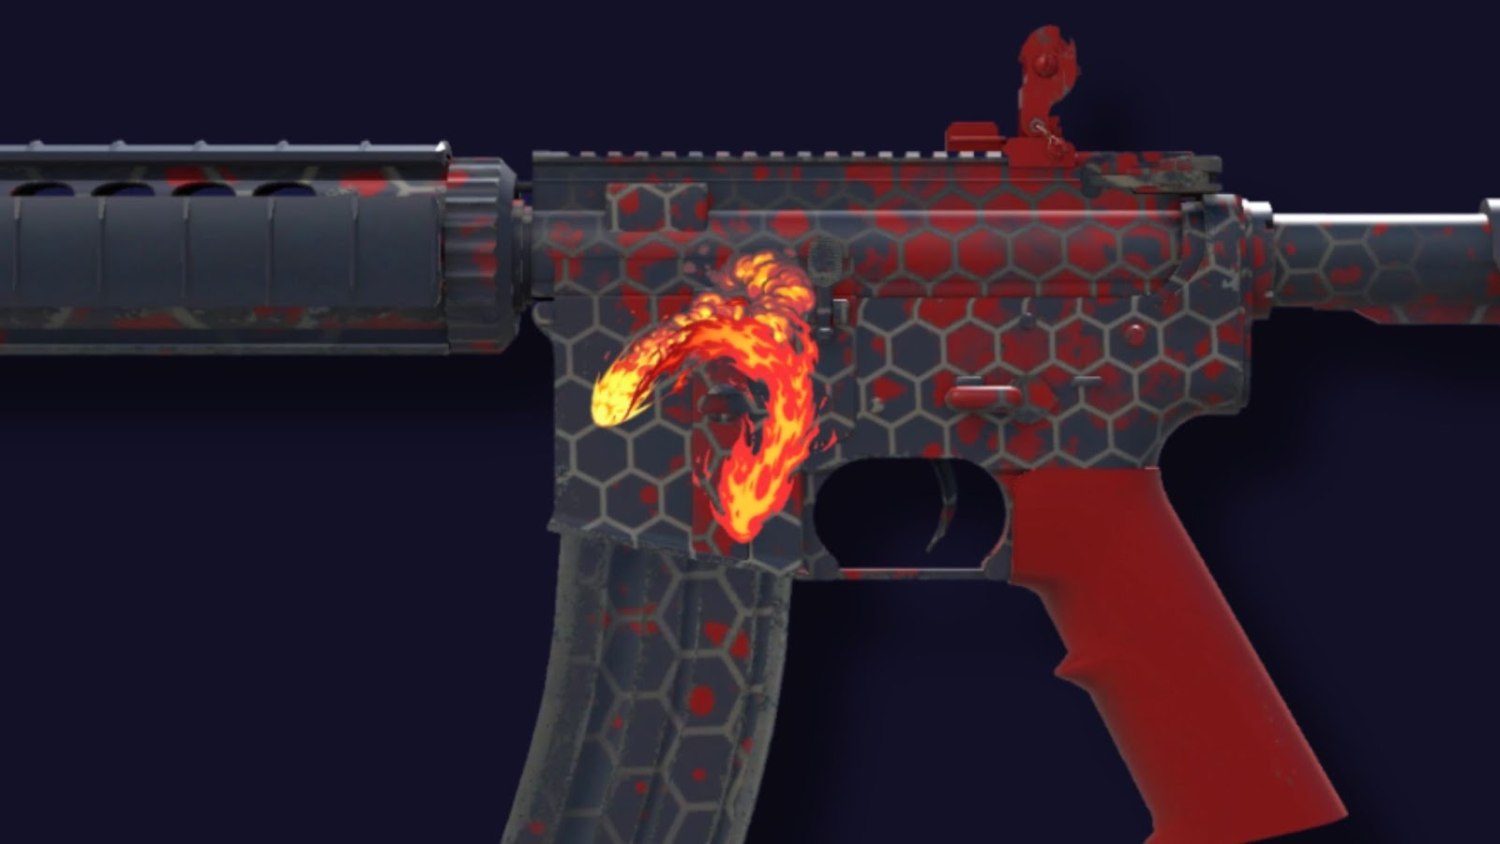
Winding Scorch: This sticker should finish the upper part of the wolf’s head, facing a bit upwards. Place it between the two previous stickers.
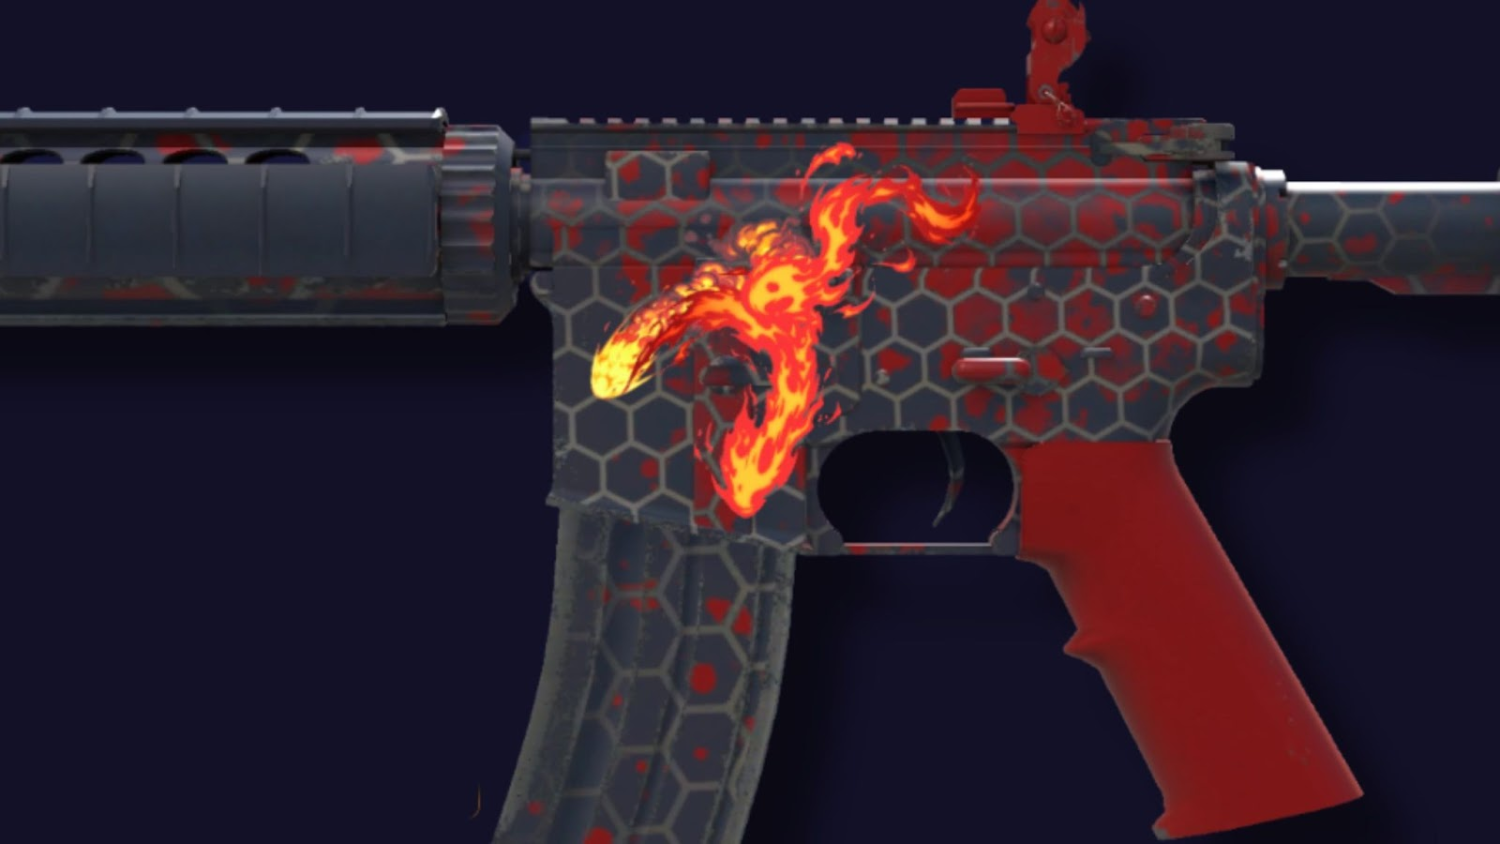
High Heat: These two consecutive stickers will help you complete the craft by being placed next to each other.
You’re all set! Enjoy your budget Howl craft gameplay and show the haters that DIY is alive and well in Counter-Strike 2. Make sure to test your craft on the server and let us know if your craft came out better looking than ours (probably yes). If you’re looking to get a bunch of stickers and skins for your future crafts cheaply, then head over to Skin.Land and purchase everything you need for the lowest prices on the market. Explore our marketplace and grab the M4A4 | Converter for your alternative fake Howl crafts. We hope this article was helpful, so stay tuned for new guides and articles.


댓글 작성